Today in this article, we shall see how to perform Azure Blob – Upload and Download data in the cloud.
We shall use AzureBlob storage client library v12 for C# .NET and perform Azure Blob storage operations using C#.NET.
Today in this article, we will cover below aspects,
This powerful library lets you perform all basic operations like,
- Creating a Storage Container
- Upload a file to Azure Blob Storage
- Download the file from Azure Blob Storage
- Enumerate all Blobs from Container
- Delete the Storage Container
Let’s see step by step all the above operation and understand how it works.
Prerequisites
- Create Storage Account in Azure Portal
- Create resources and policy on access.
Getting Started
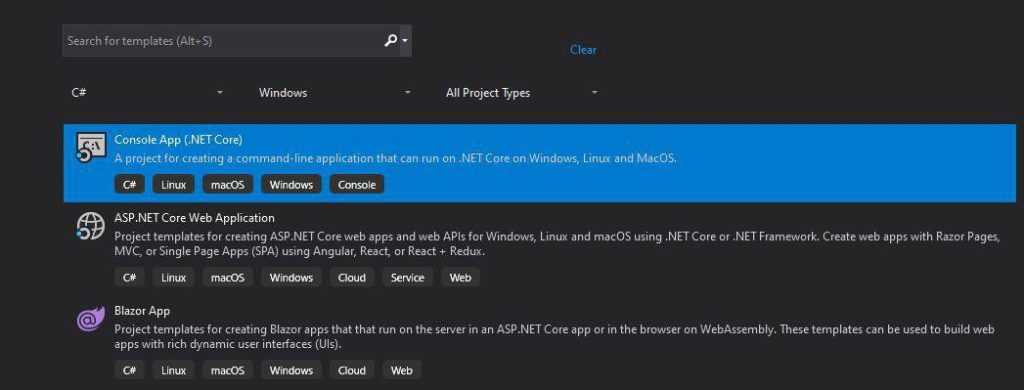
Create any .NET or .NET Core C# application. Here I am using the Console .NET Core application,

Please install Nuget packages,
PM> Install-Package Azure.Storage.Blobs -Version 12.6.0
Or
Using Nuget Package Manager

To demonstrate the concept, I shall be Uploading and Downloading the file to Blob storage.
To start with you shall be needing the StorageAccount Connection string from the Azure portal.
Retrieving connection string from Azure
Please follow the below steps to get the connection string from the Azure portal,
- Sign in to the Azure portal account
- Go to your storage account. Ex. vstorageaccount
- Click on the Access keys.
- Copy the Connection string value under key1
- Either add the Connection string to your apsettings.json or add it to the Environment variable.
Below is how I can get the Connection string from the Azure portal,

BlobContainerClient – Create Storage
You can create a storage container using the BlobContainerClient object and calling Create or CreteAsync method as shown below,
             string connectionString = configuration["BlobConnectionString"];
            // Get a reference to a container
            BlobContainerClient container = new BlobContainerClient(connectionString, "pdffilecontainer");
            await container.CreateAsync();
The above code programmatically will generate the new container name called “pdffilecontainer“. The operation creates a new container under the given account. If the container with the same name already exists, the operation fails.
Once created successfully, you can see the newly generated container in the Azure portal as below,

BlobContainerClient – Upload Data/File to Storage Container
Let’s now upload data, an image, or a PDF file to Azure Storage Container.
I have a sample PDF file placed locally on the below location,
“C:\Test\AzureEventProducer\AzureBlobTest.pdf”
Let’s upload this local file to the container,
            string connectionString = configuration["BlobConnectionString"];
            string blobName = configuration["BlobName"];
            // Get a reference to a container
            BlobContainerClient container = new BlobContainerClient(connectionString, "pdffilecontainer");
            // Get a reference to a blob
            BlobClient blob = container.GetBlobClient(blobName);
            // Upload local file at a given path to Azure storage
            await blob.UploadAsync(filePath);
I have given the Blob Name as “PdfBlob“.
After successful execution of the above method, a new blob will be added as below,

BlobContainerClient – Download File or Blob from Azure
Let’s now try downloading the same file, we just uploaded in the above step.
Here to demonstrate, I shall be downloading a file from Azure blob storage and putting it on a local path i.e download path = @”C:\Test\AzureEventProducer\OutPut\AzureBlobTest.pdf”;
Below is the complete code for Download,
            string connectionString = configuration["BlobConnectionString"];
            string blobName = configuration["BlobName"];
            string containerName = configuration["ContainerName"];
            // Get a reference to a container
            BlobContainerClient container = new BlobContainerClient(connectionString, containerName);
            // Get a reference to a blob
            BlobClient blob = container.GetBlobClient(blobName);
            // Download file to a given path from Azure storage
            await blob.DownloadToAsync(downloadPath);
Above BlobContainerClient class object gives references to container and then BlobClient class object allows you to manage Azure Storage blobs within the container.
After successful execution of the above method, a new blob will be added as below,

Get all Blobs from Container
One can easily enumerate all the available Blobs from a given container using the below logic,

That’s All! Happy Coding!
References:
Do you have any comments or ideas or any better suggestions to share?
Please sound off your comments below.
Happy Coding !!
Summary
Today in this article we learned how to upload and download the data in the cloud using Azure Blob storage client library v12 for .NET-based applications. We understood it’s simple and easy to manage the data in azure by uploading or downloading.
Please bookmark this page and share it with your friends. Please Subscribe to the blog to receive notifications on freshly published(2024) best practices and guidelines for software design and development.